

Granting a few Discord roles by hand feels manageable right up until it isn’t. Members join, cancel, upgrade, and lapse on their own schedule, and within a month your role list has drifted away from who’s actually paying — a handful of churned members still sitting in the private channels, a new subscriber waiting on access.
Zendra’s Discord integration keeps that in sync for you: active members get the roles you configure, and they lose them when the membership ends. This guide covers the full setup, including the one configuration mistake that trips most people up.
Discord access is a Growth-plan feature, so you’ll want to be on Growth (or upgrade) before you start.
Set it up once, and access manages itself.
The Zendra Discord integration
When a member is active on a plan with Discord access, Zendra assigns the roles you’ve chosen — which can unlock private channels, permissions, or anything else you tie to a role in your server.
When the membership ends, those roles come off, optionally after a grace period. From there, renewals, upgrades, and cancellations all keep roles in sync without any manual work.
Step 1 — Connect your server
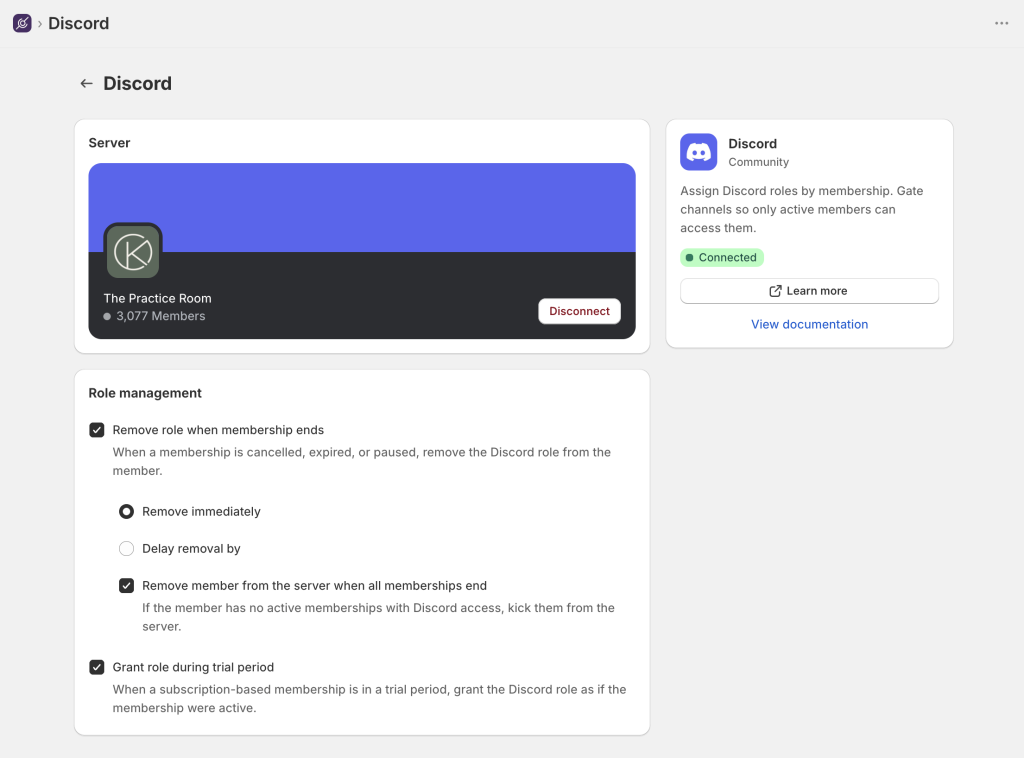
In Zendra, go to Settings > Integrations, find Discord, and click Connect Discord server. You’ll be redirected to Discord to authorize the Zendra bot — select the server you want to connect and approve it.
The bot asks for a few permissions so it can manage roles on your behalf: Manage Roles, Kick Members, Create Instant Invite, and View Channels. These are requested automatically during authorization. Once connected, the Integrations page shows your server’s name and icon, confirming it’s live.
Step 2 — Add Discord access to a plan
With the server connected, open the plan you want to gate (under Plans), find the Integrations section, and add a Discord access perk. Pick one or more roles from the picker — these are pulled straight from your server, and you can create a new role here if you need one. Give the perk a label, since that’s what members see in their portal (“Discord access,” “Join our community,” whatever fits), and save the plan.
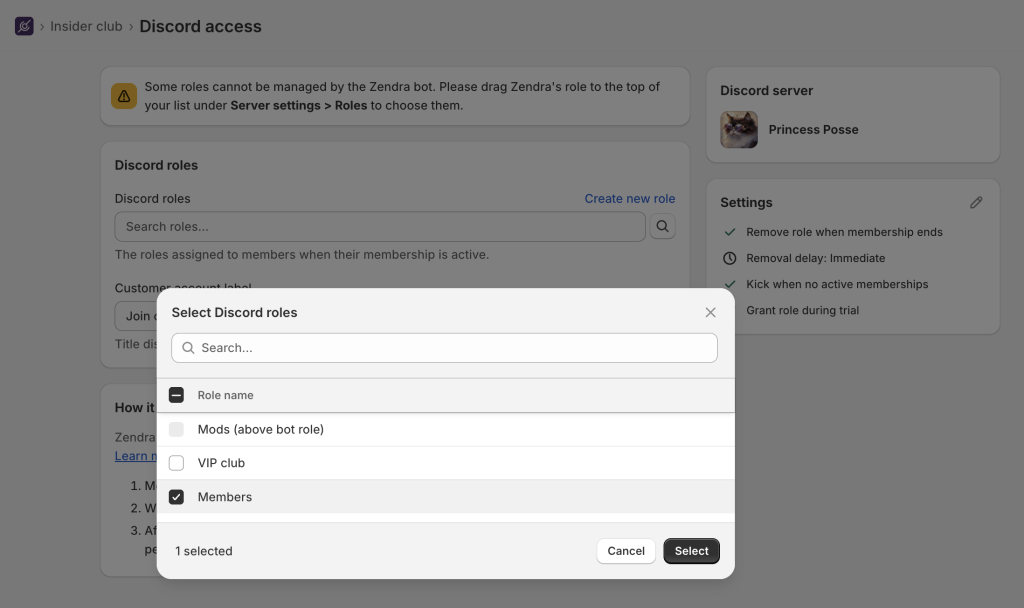
Each plan can have one Discord access perk, but that perk can assign several roles. If you run tiers, each tier can grant different roles with different channel access — for example, Silver into the general lounge, Platinum into everything.
Step 3 — Decide what happens when a membership ends
On the Discord settings, you control what happens during the membership lifecycle:
- Remove role when membership ends: on by default. When a membership ends or pauses, the assigned roles are removed.
- Removal delay: optionally wait a set number of days before removing roles. This gives lapsed members a grace period to resubscribe; if they do, the removal is skipped automatically.
- Remove from server: off by default. When on, members are removed from the server entirely once they have no active memberships with Discord perks. Off lets them stay in public or free channels once they’re no longer a member.
- Grant role during trial: on by default, so members on a free trial get access right away rather than waiting for their first payment.
Setup tip: bot role hierarchy
There’s one step that can be easy to miss, due to the way Discord manages bots and integrations.
For Zendra to manage a role, the Zendra Memberships bot role must sit above that role in your server’s role list. Open Server Settings > Roles in Discord and drag the Zendra Memberships role above any role you’ve assigned to a plan.

If the bot role sits below a managed role, Discord blocks the bot’s ability to manage the role, so Zendra will flag a warning on the perk settings.
The same goes for missing permissions — if the bot is short a permission like Manage Roles, Zendra surfaces the warning and points you to reconnect.
The member experience
Once a plan has the perk, members get a Discord section in their member portal. Before they’ve connected, it shows your server’s name, icon, description, and member count, along with a Log in with Discord button.
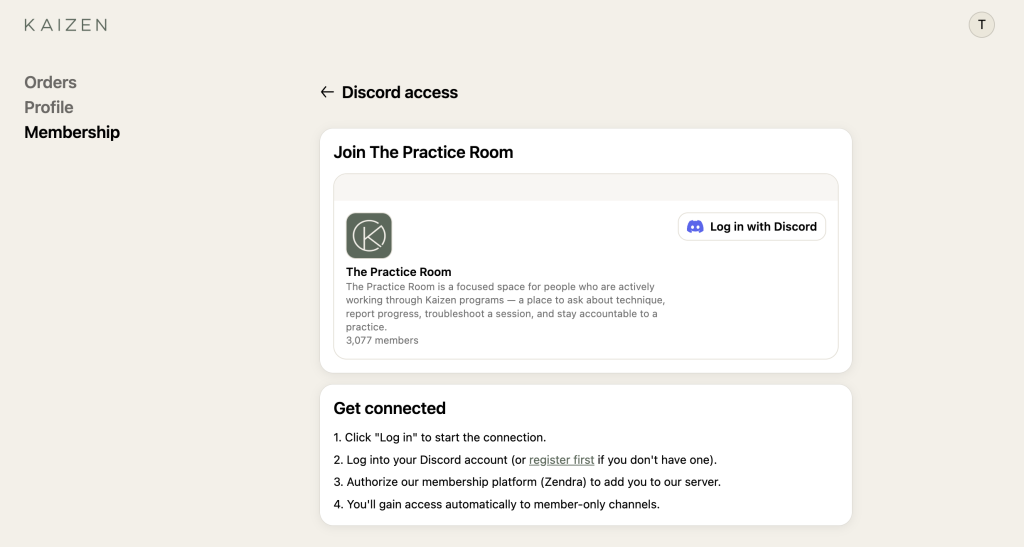
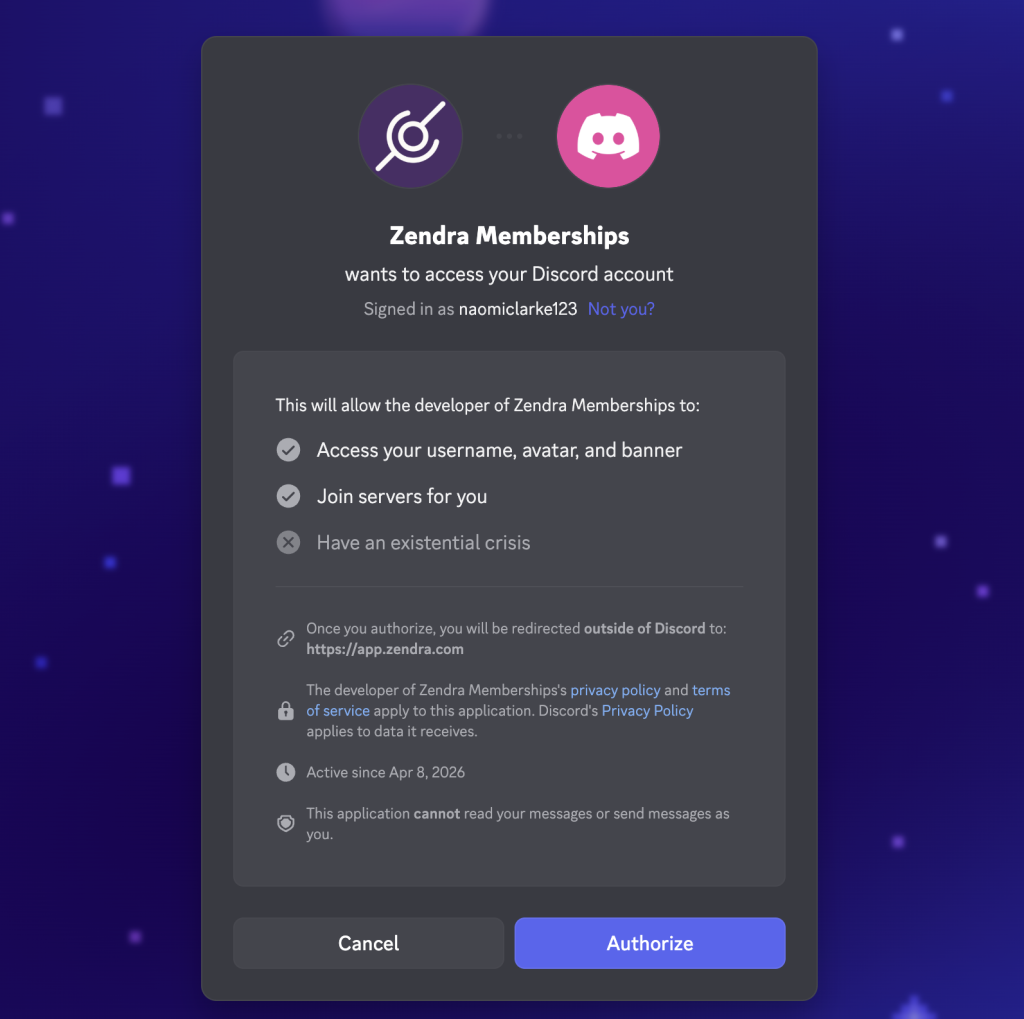
Clicking it opens a Discord authorization popup; the member logs in (or creates an account), approves the connection, and they’re added to your server with the right roles immediately.
Note that during that first connection, members see Zendra’s name rather than your store’s. That’s how the Discord API adds integrations: our connector is what adds members and manages roles, so its name shows on the join step.
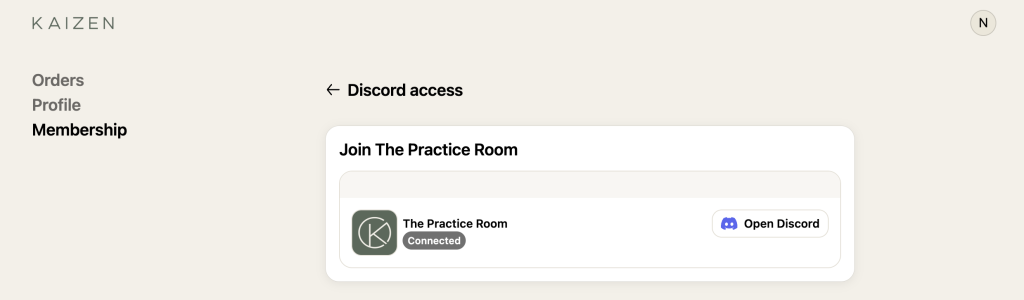
After connecting, the portal shows a Connected badge and an Open Discord button, and the server card displays your server’s banner, icon, and description.
A fully automated sync
After the initial connection, members (and you!) don’t have to do anything. Zendra keeps roles current in the background: a new membership grants the roles; a renewal keeps them; a cancellation, pause, or expiry removes them per your settings; and an upgrade or downgrade swaps roles to match the new plan.
If a member disconnects their Discord account on their end, the connect button simply reappears in their portal so they can reconnect.
Start using Discord with Shopify memberships
If you’ve already mapped out your community (here’s how we’d structure one), connecting Discord is the part that makes it run itself. Make sure you’re on the Growth plan, connect your server, and add the access perk to a plan — then access manages itself.
For the reference version of every setting, see our Discord integration docs, or add Zendra to your store to get started.



Leave a Reply