

Ask a shop owner what they want from a membership, and you’ll hear about people. I want our regulars to feel noticed. Wholesale buyers shouldn’t have to email me for a price list. The customers who buy every month should hear about new releases first.
Then open a plan form, and the questions change. How does someone become a member? What’s the billing interval? Is there a trial? Which perk type, applied to what? Both sets of answers describe the same program, but they’re written in two different languages: one about relationships, the other about configuration.
Until now, translating between them has been the merchant’s job, and it’s the step where a perfectly good idea can sit in planning for weeks. (We’ve made the case before that your first membership should launch before it’s perfect, but a blank form doesn’t make that easy.)
Zendra Assistant turns your goal into draft plans
Zendra Assistant, now on in every Zendra store, does that translation with you. Describe what you want your membership to do in your own words, and it recommends a structure: the plan (or one plan per tier), how members join, billing options and prices, and the perks members get, along with why that structure fits your goal. When the recommendation looks right, confirm it from the card, and Zendra builds it as real draft plans you can open, edit, and set live. The Assistant is available on every Zendra plan, including Free, and it also answers quick “how do I…” questions about Zendra.
The Assistant proposes and drafts, but it never publishes. Nothing exists in your store until you confirm a recommendation, every plan it creates starts as a draft, and nothing reaches your storefront until you set a plan live yourself. (Perks on a draft plan don’t apply to anyone yet. They switch on when you set the plan live, so there’s no separate step to remember.)
Why membership setup needs a translation step
A plan form is precise, and that precision is what makes it a hard place to start. It asks you to commit to structure, like a trigger, an interval, or a perk type, before you’ve finished deciding what the program is for. It’s usually easier to react to a proposal than to author one from nothing: “that’s close, but drop the monthly option” is a much easier sentence to say than a fully specified billing plan.
The Assistant flips the order. You start with intent, and Zendra shows you what that intent looks like in its own vocabulary, side by side. “Reward our regulars” becomes a specific plan with a specific way to join and specific perks, and you can see the mapping instead of guessing at it. Think of Star Trek’s universal translator, except you get to read the transcript before anyone signs anything.
And because the result is a set of drafts, each plan opens on its own plan page, where you can inspect and change it as if you’d built it by hand.
What you see in a conversation
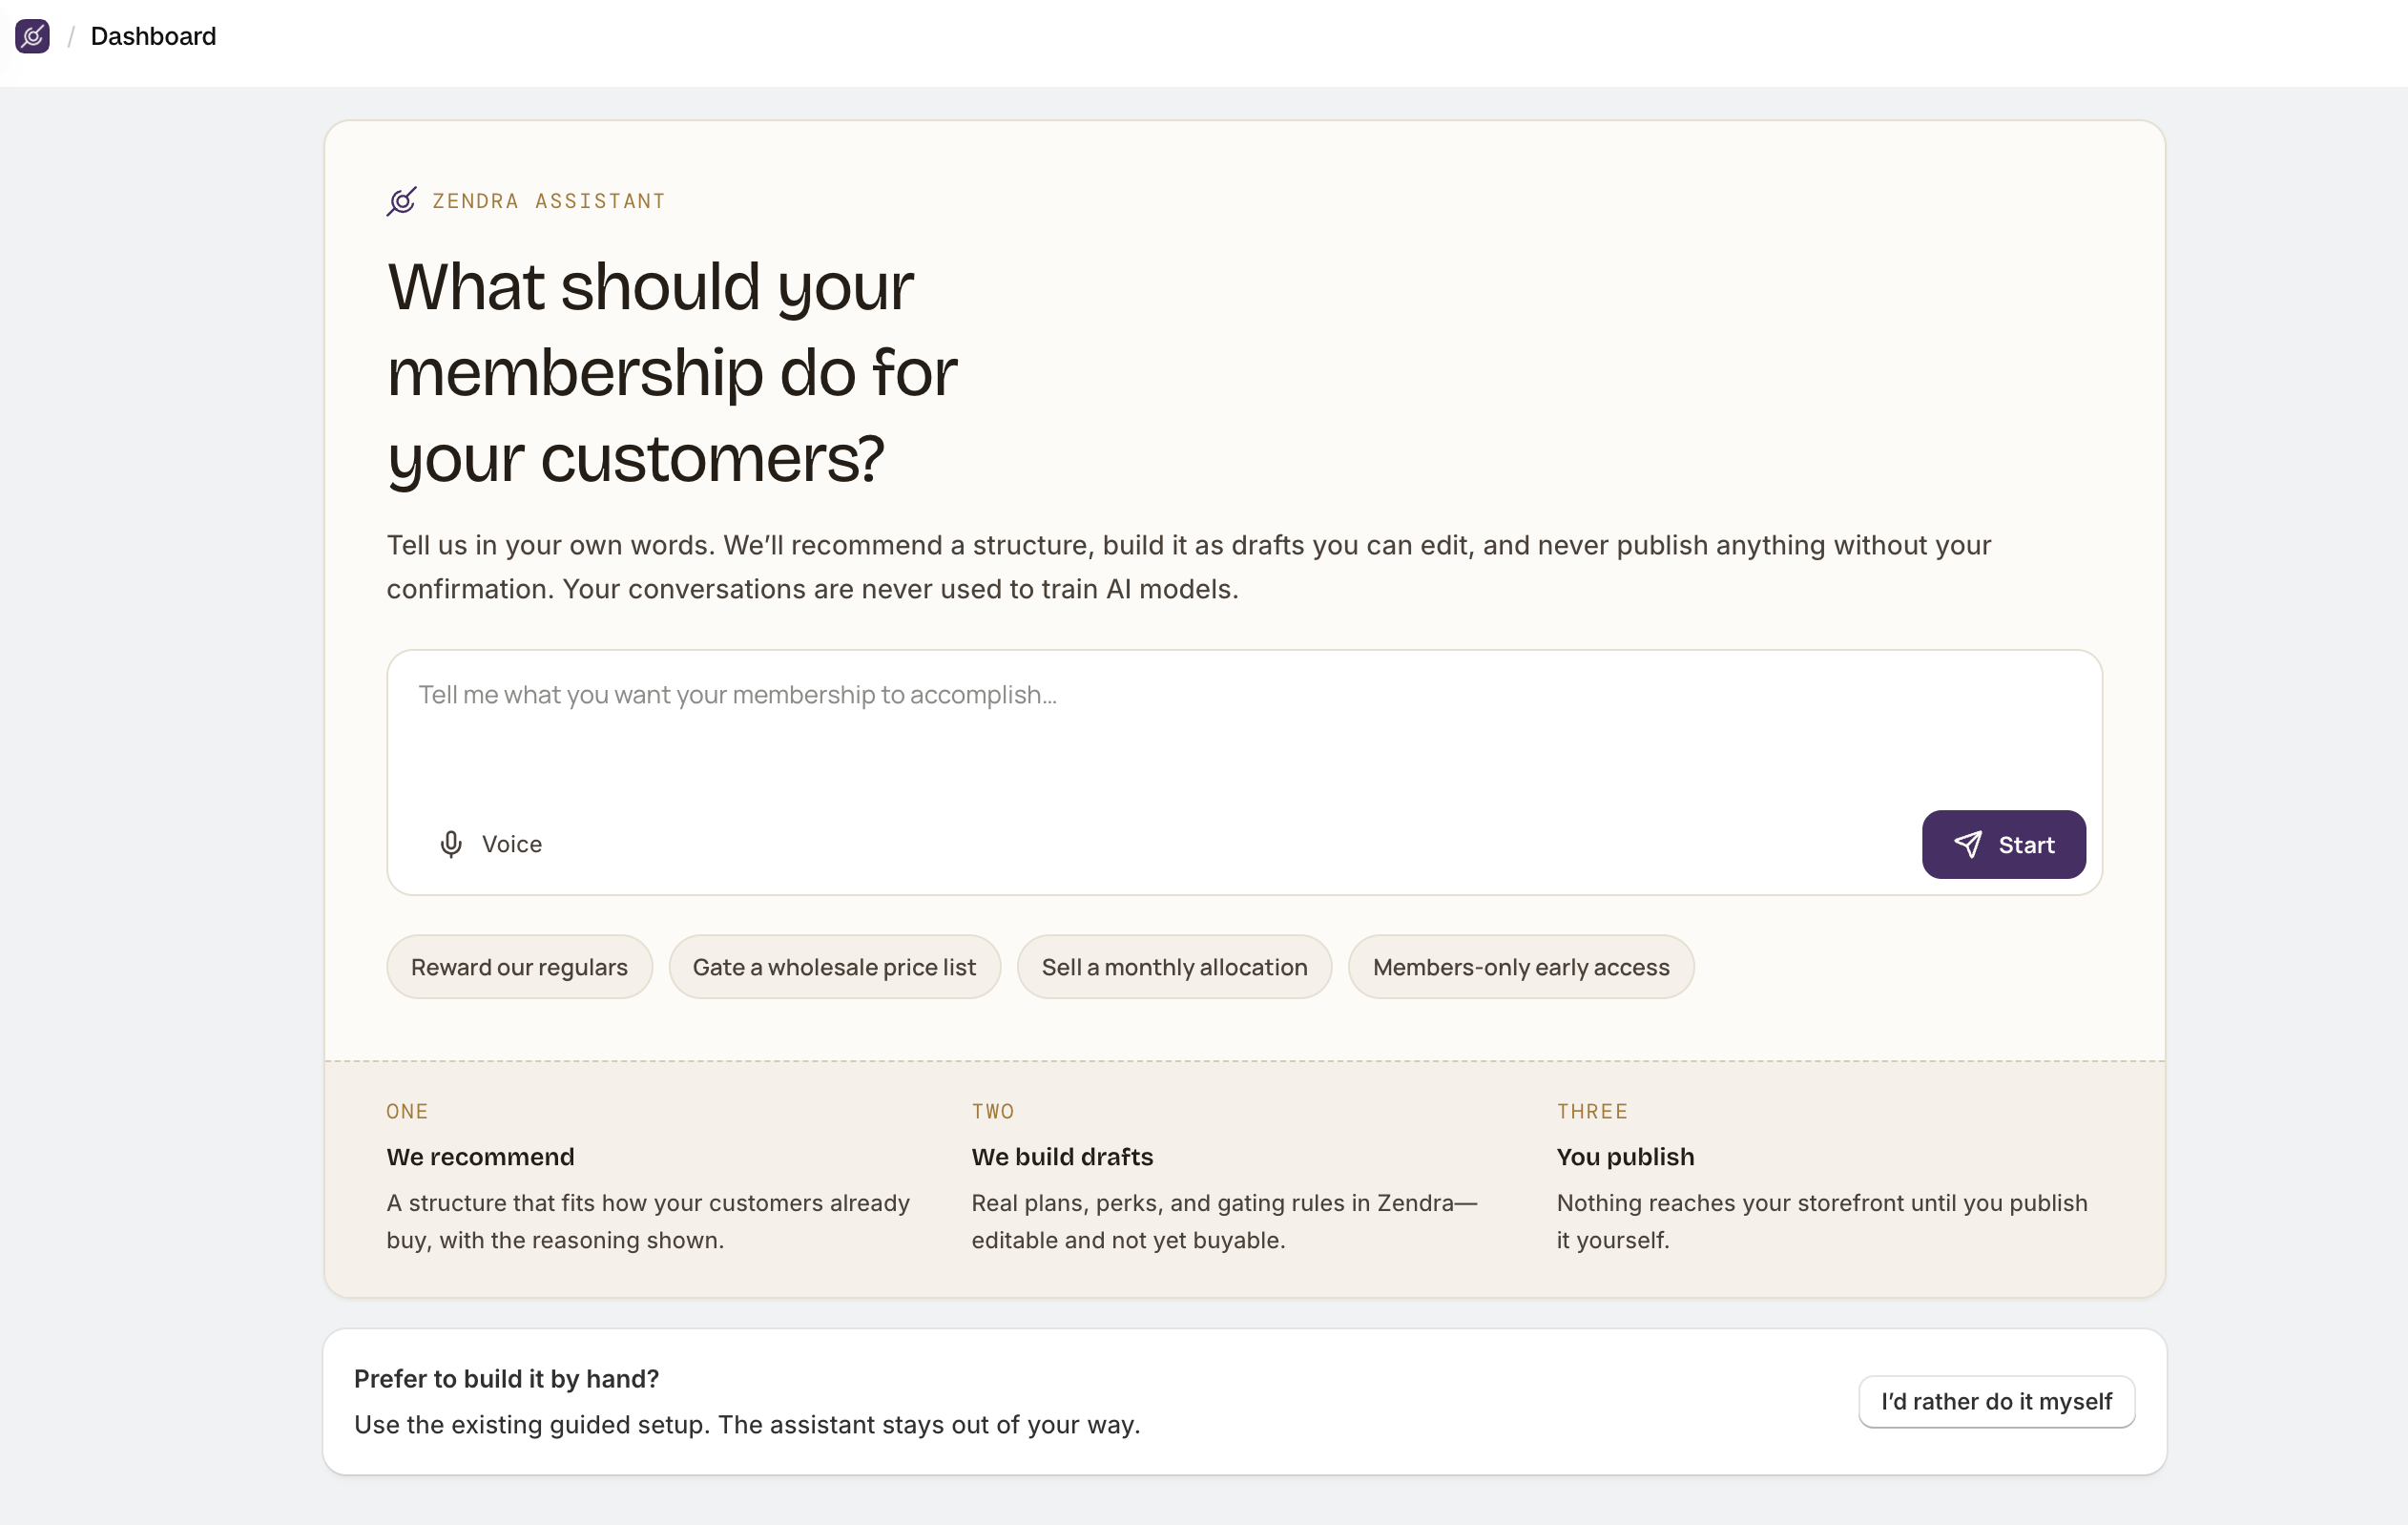
The welcome screen asks one question: What should your membership do for your customers? You can type an answer, click Voice to dictate it (the Assistant transcribes what you say into the message box, so you can check it before sending), or pick one of four starter ideas:
- Reward our regulars. Regulars tend to be people who’ve earned their place rather than paid for it, which is the idea behind earned memberships.
- Gate a wholesale price list. A familiar wholesale club pattern, and a good one to read closely against the perk list later in this article.
- Sell a monthly allocation. A paid plan with recurring billing, where the price and billing options are the decisions worth pushing back on.
- Members-only early access. A perk that works best when you’ve planned around dates rather than frequency.
Describe your goal the way you’d explain it to a colleague: who it’s for, what members get, and whether they pay, sign up, or earn their way in. The Assistant may ask a question or two first, such as how you’d like to price the program or whether you already have a product for it; if you’re happy for it to choose, tell it to go with its suggestions.
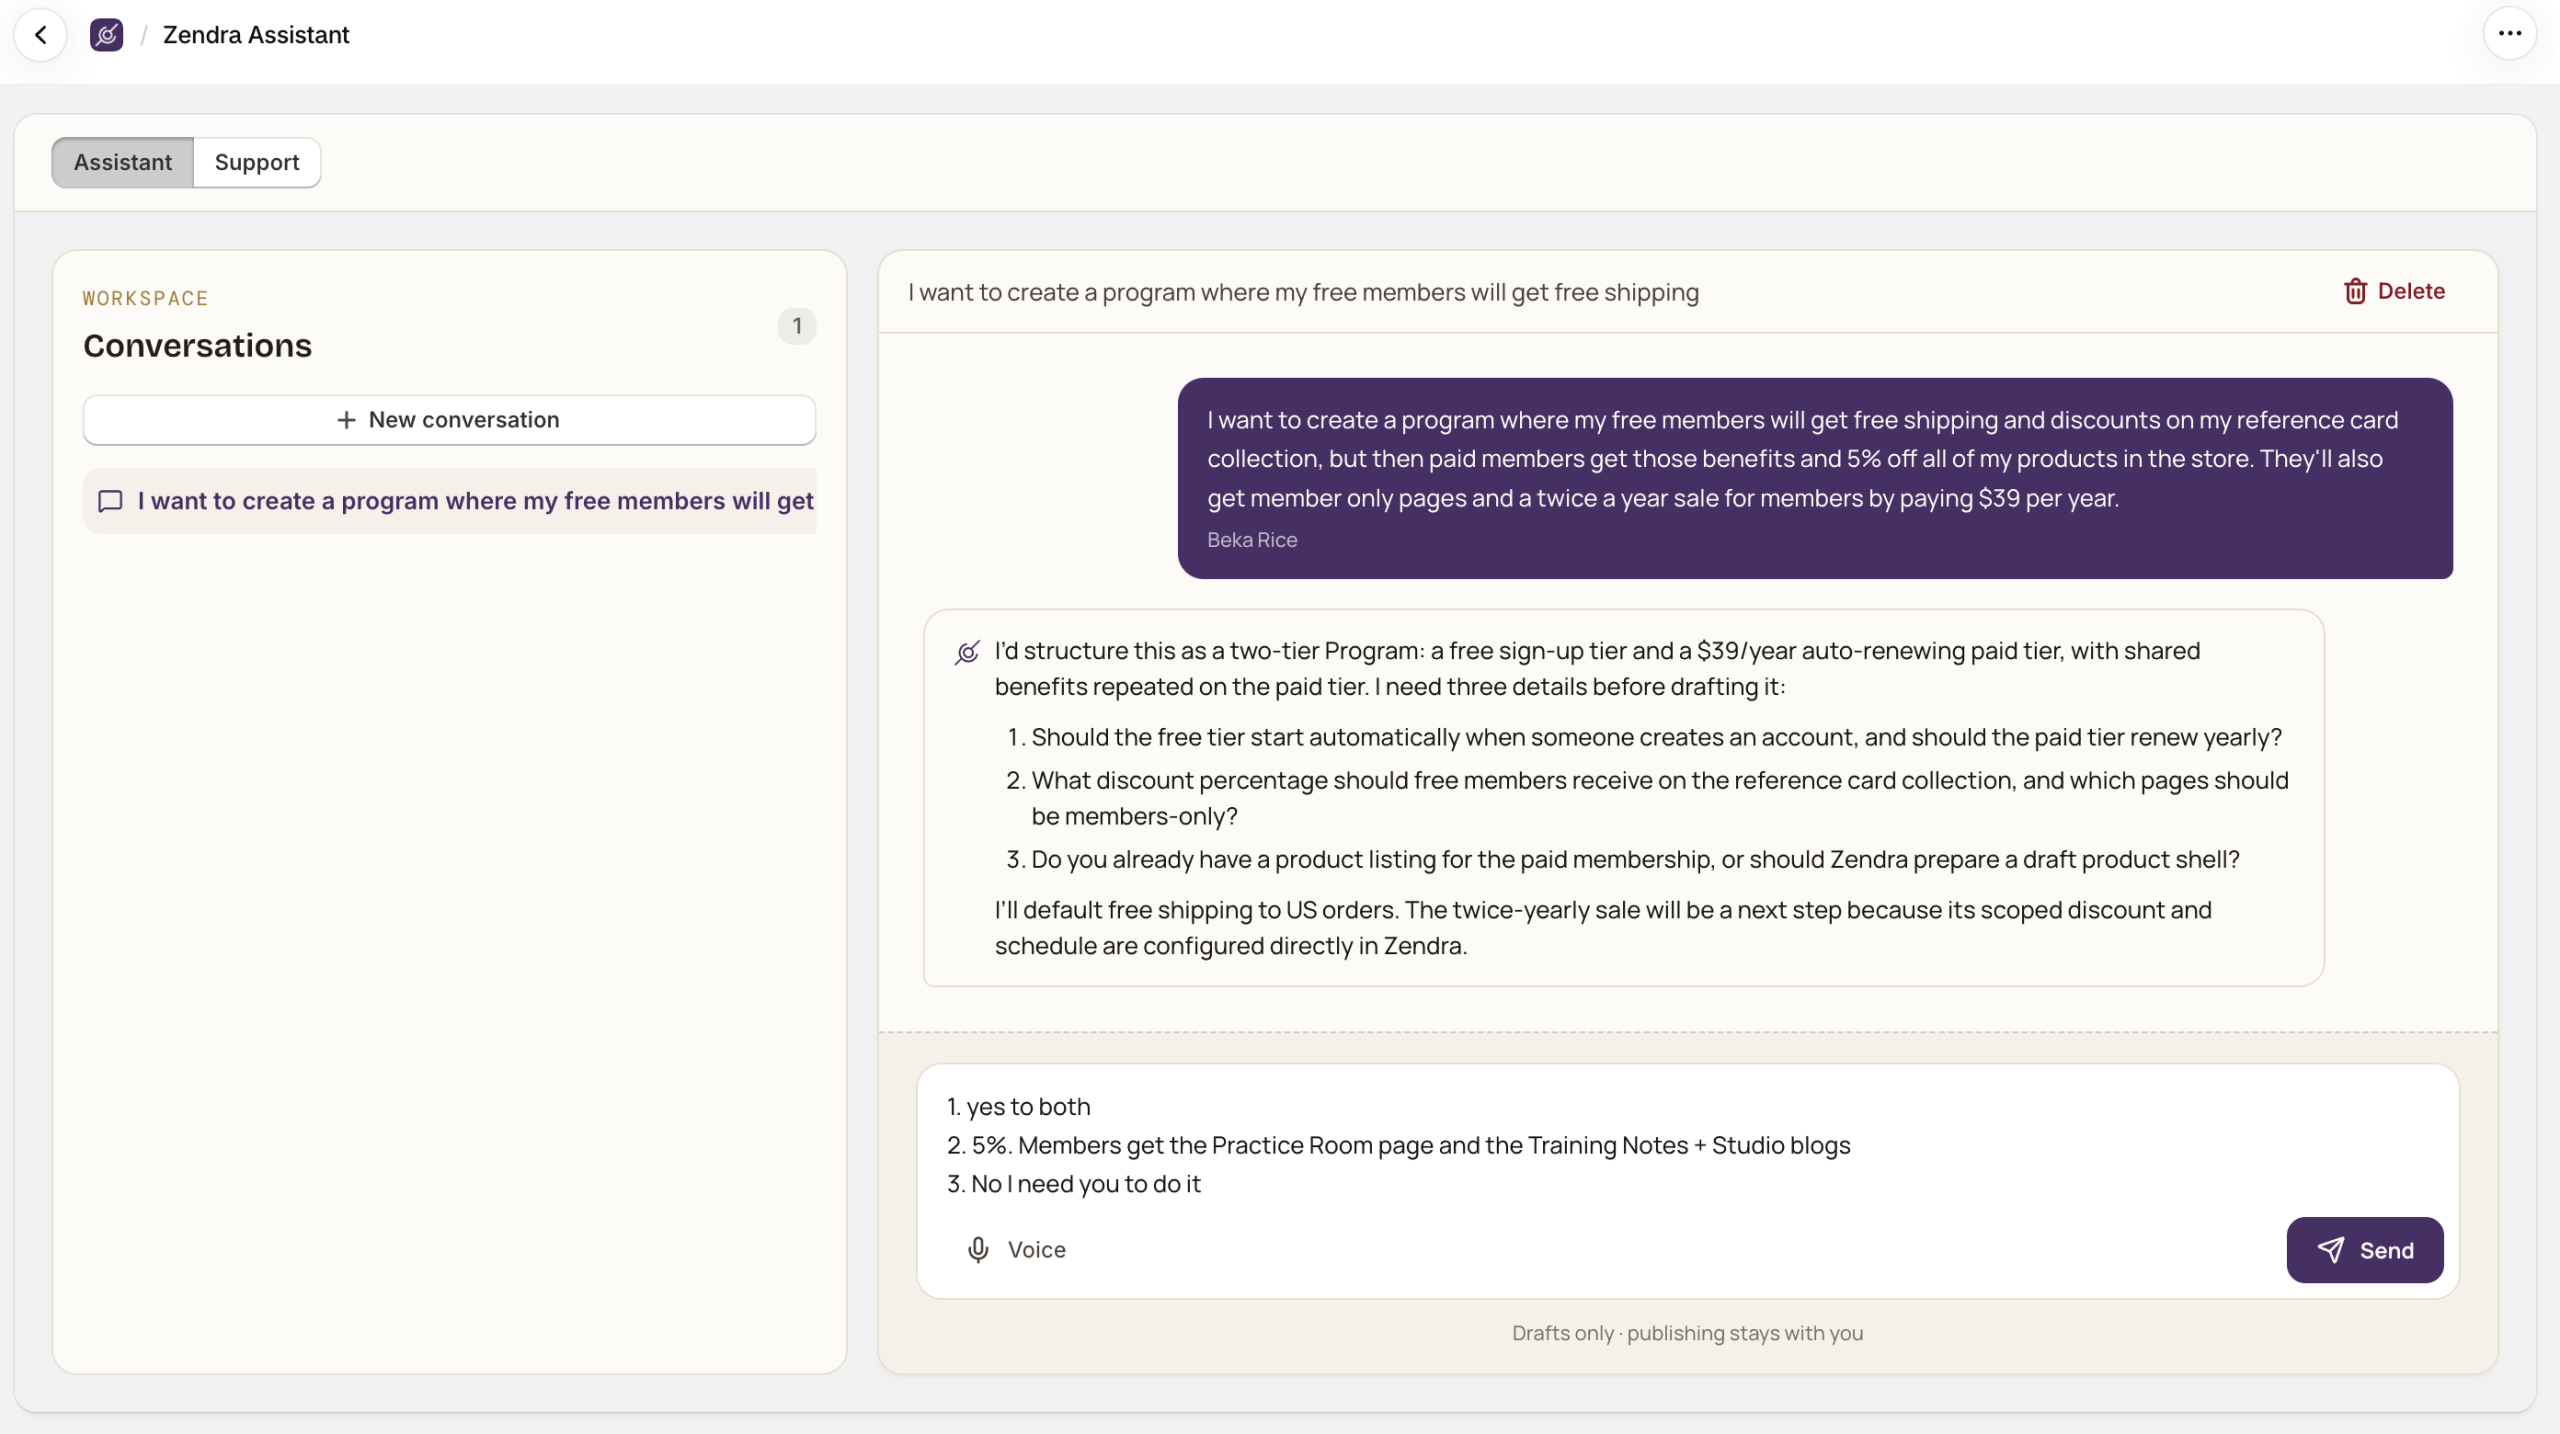
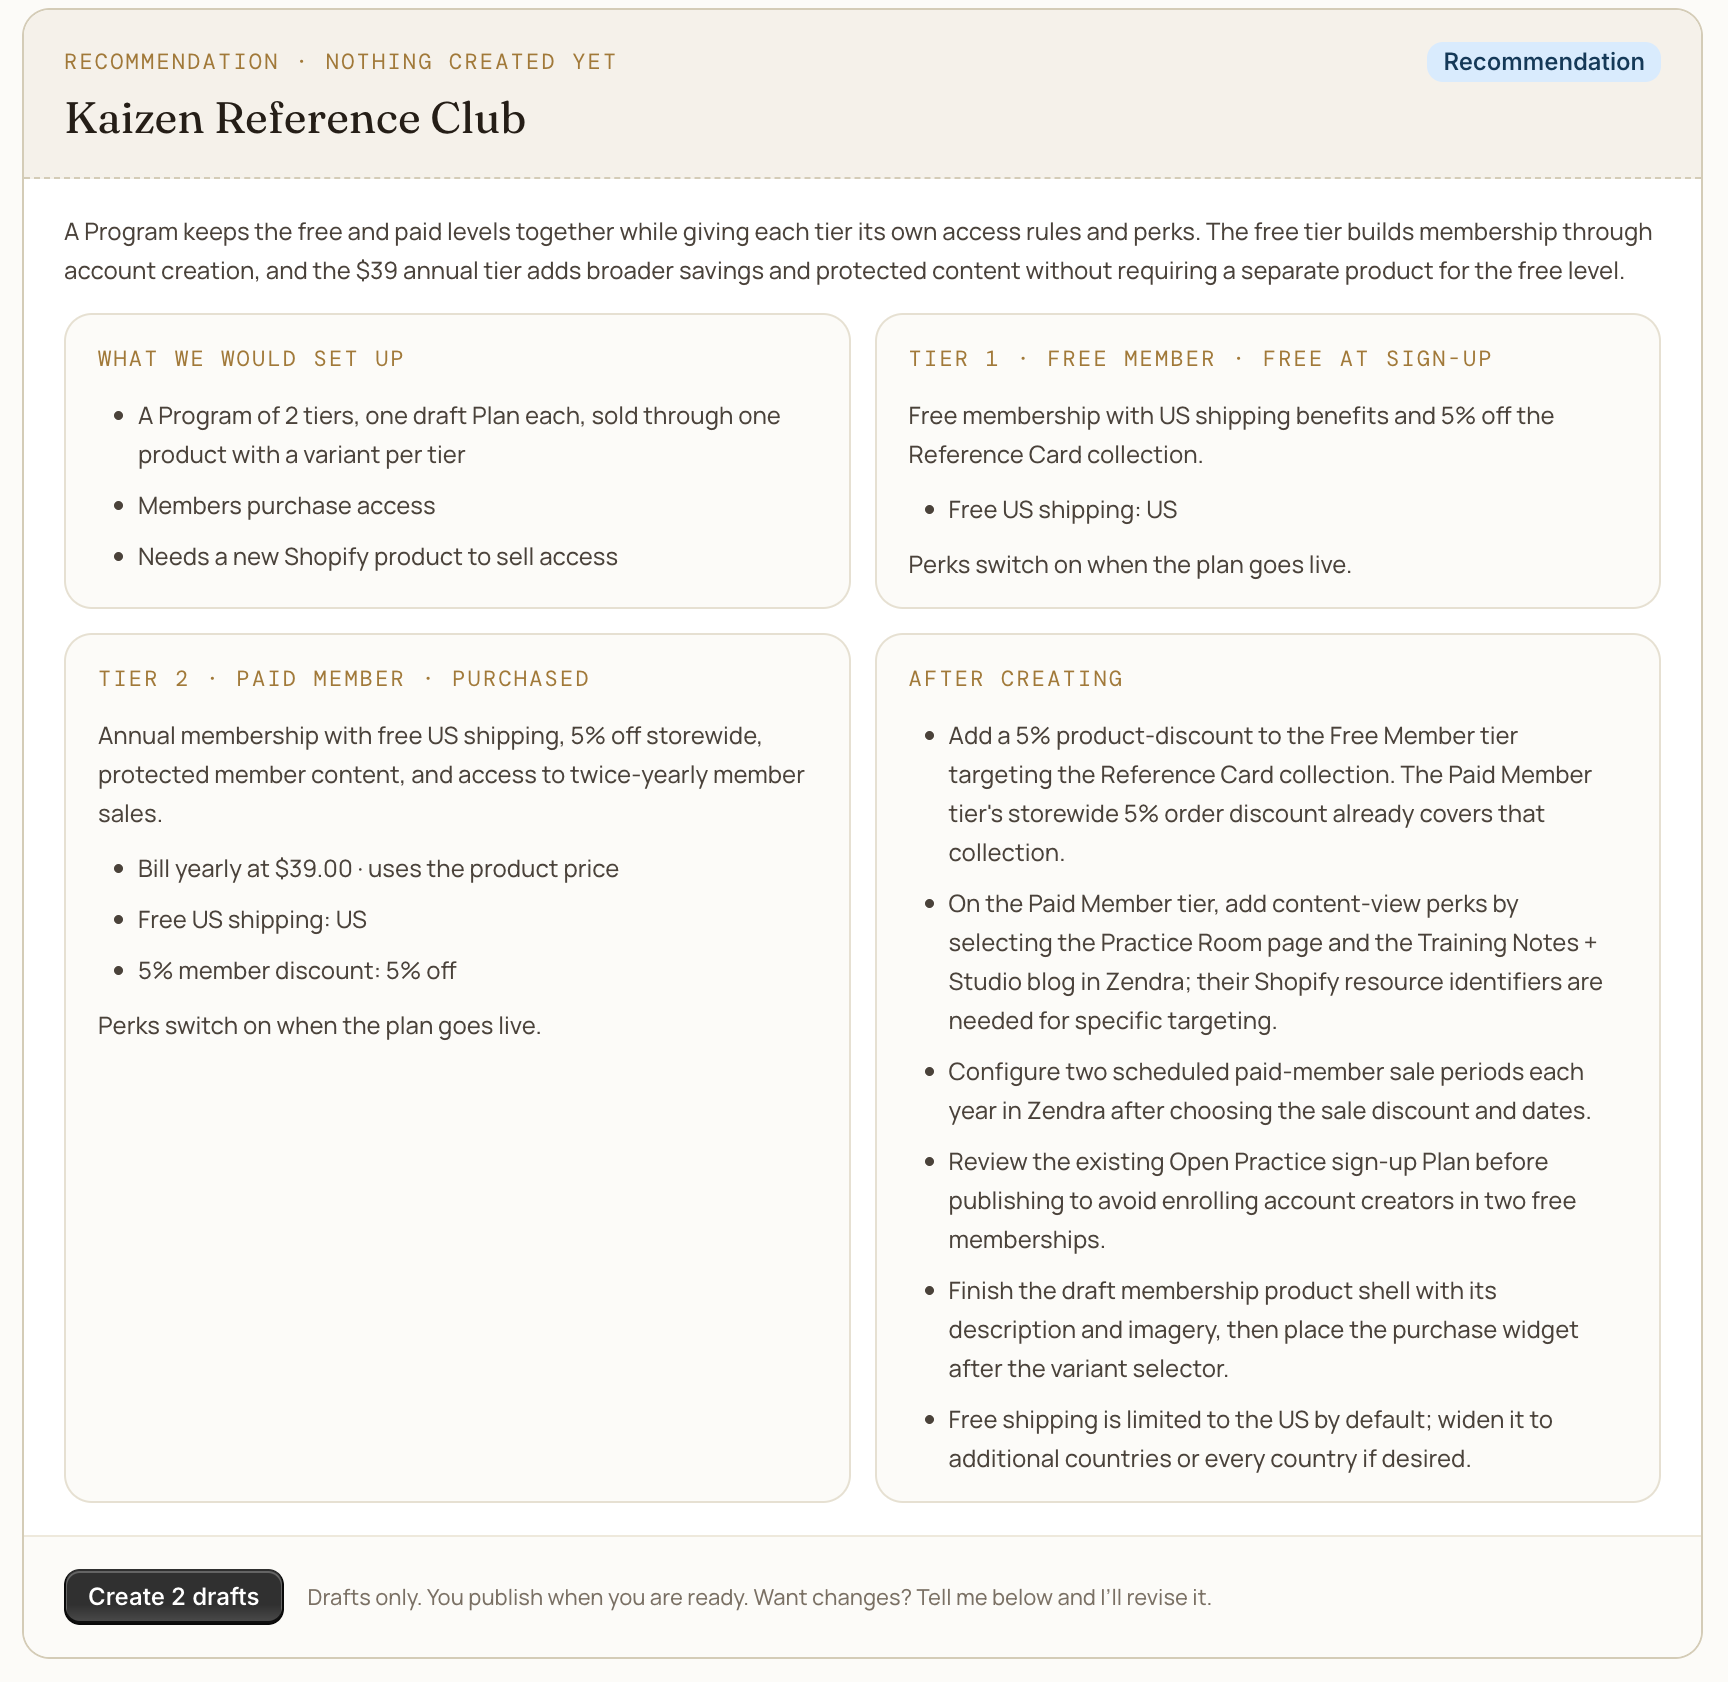
When it has enough to go on, it replies with a recommendation card that opens with why the structure fits your goal. Under What we would set up, the card lists the plan (or one plan per tier, for a tiered program), how members join, its billing options and prices, and the product it would sell through; the perks members get are listed below that. Nothing has been created at this point, so if something’s off, reply in the conversation (“drop the monthly option,” “add free shipping”) and the Assistant revises the recommendation.
The button at the bottom of the card builds the plans, billing options, and perks exactly as the card showed them. For a single plan it reads Create as drafts. A tiered program becomes one draft plan per tier, so the button counts them: Create 2 drafts for a two-tier program.
Turn a draft plan into something customers can buy
A plan that customers purchase needs a Shopify product, so the plan card offers Create a draft product for this plan. Zendra creates a draft Shopify product with the plan’s name and price and links it to the plan; it isn’t published to any sales channel. If you already sell this through a product, choose Use an existing product instead. For a tiered program, Zendra creates one product with a variant for each tier members buy, and the button says how many (Create a draft product with 2 variants, for example). If you already have that product, connect each variant on its tier’s plan page instead.
Zendra sets up the product’s structure, but the listing itself is yours. Under Finish the listing with Sidekick, click Copy prompt and paste it into Shopify Sidekick in your Shopify admin (Open in Sidekick, beside it, takes you there). The prompt asks Sidekick for a description and imagery in your store’s style, and tells it to leave the variants and prices alone and not to publish.
If a tier is one members earn instead of buy, such as after a number of orders, the card also offers a Sidekick prompt that builds the Shopify Flow workflow to grant it, ready for you to review and turn on.
From there, open the plan with Review draft (a tiered program’s card has Review this tier beside each tier, and Review drafts opens your plans list), check the details, and click Set live when you’re ready. Its perks start applying at that moment, and you publish the product in Shopify whenever you want customers to be able to buy it.
Know where the Assistant stops
- It creates three perk types: free shipping, member discounts on a member’s whole order, and member content. Free shipping starts with your store’s own country, and the Assistant offers to widen it. More perk types are being added rapidly.
- An order discount applies to sale items, too. If you’d rather keep sale items out, the Assistant still drafts the order discount and tells you that a product discount with sale items excluded is the way to do it, which you set up on the plan page. (Here’s why stacking member discounts on sale prices is worth avoiding.)
- It builds within your current Zendra plan. When a better version of your idea needs a paid feature, it builds what your plan can do now and tells you which plan unlocks the rest.
- It revises drafts, and only adds to live plans. Name any draft plan in a conversation and the card leads with what would be added, changed, or removed (Show full draft shows the rest) before you click Update the draft; anything you added to that draft yourself stays as you set it. A live plan already has members, so the Assistant only adds new perks (which arrive turned off) and wording changes. It declines price, billing, access, and existing-perk changes on a live plan; make those on the plan page, or set the plan back to draft first.
- It has usage limits. Each person can send a limited number of messages an hour, and the Assistant has a daily usage cap. Your drafts and conversations stay put if you reach either one.
- Your conversations are never used to train AI models.
Open Zendra Assistant in your store
There’s nothing to install or turn on. Four ways in:
- Open Assistant in the Zendra menu.
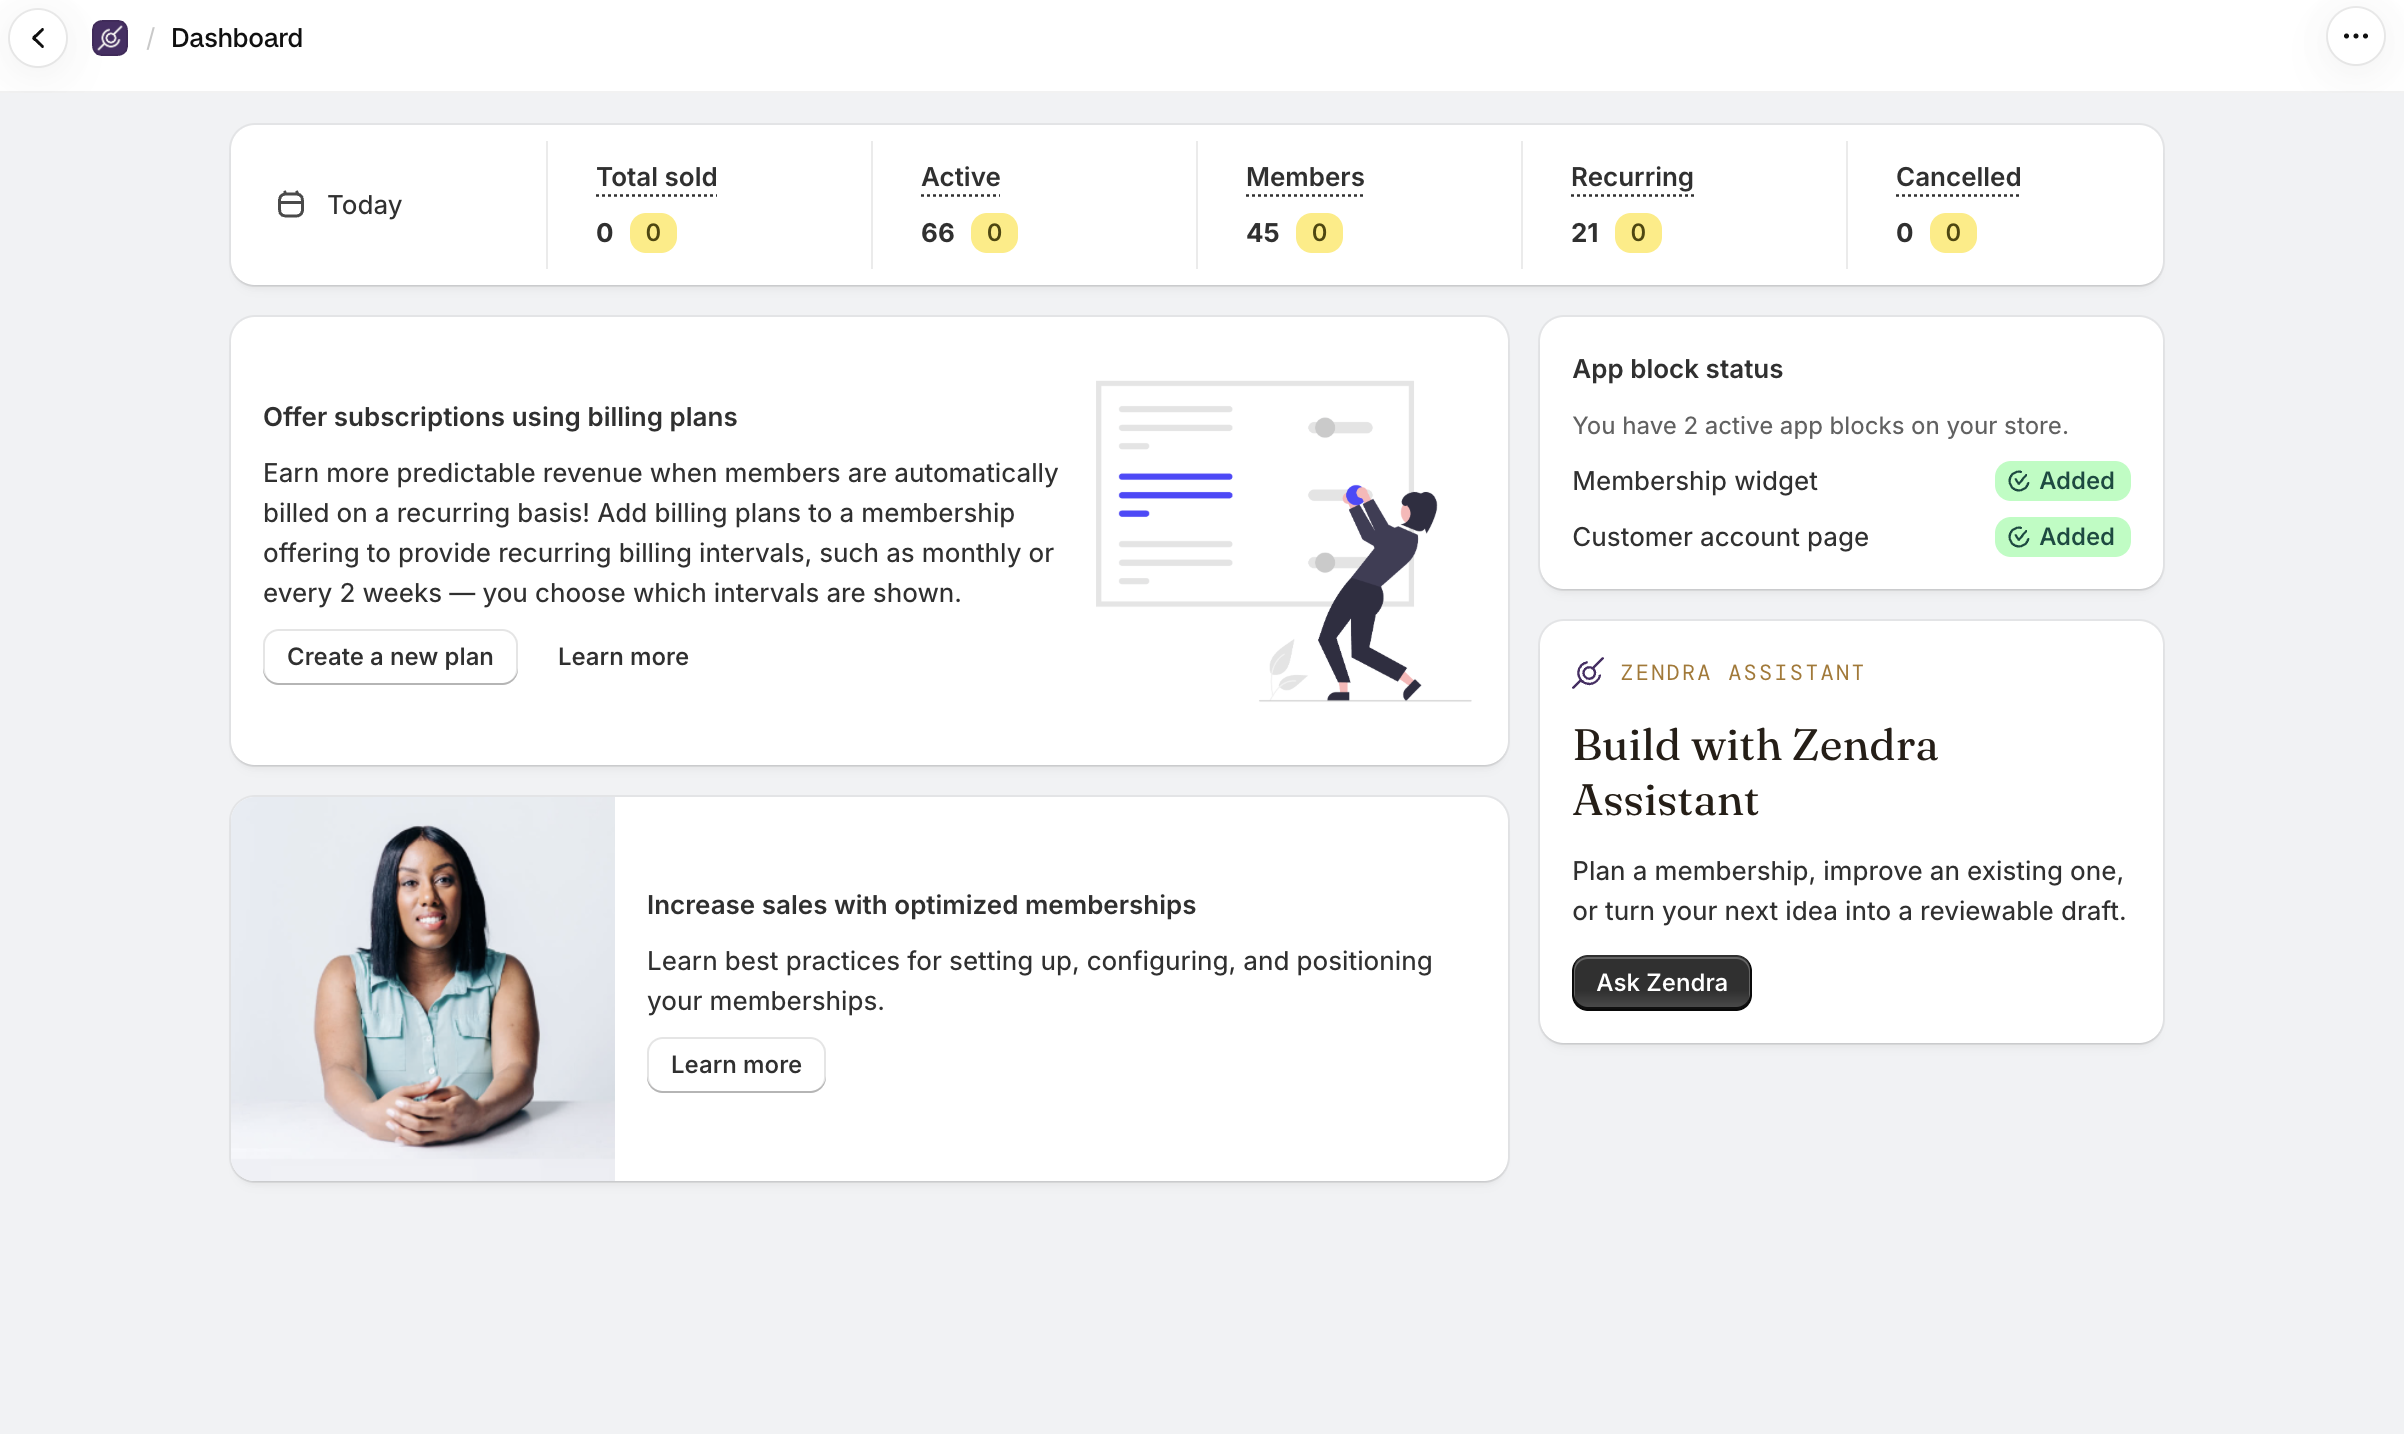
- On your dashboard, click Ask Zendra on the Build with Zendra Assistant card.
- On any other Zendra page, click Ask Zendra in the bottom-right corner to open the Assistant in a side panel. (The button appears on wider screens; on a phone, use the menu item.)
- If you’re new to Zendra, your dashboard opens with the Assistant in place of the setup checklist. Prefer to build your first plan by hand? Click I’d rather do it myself for the guided checklist instead.
For the full walkthrough and troubleshooting, see Plan your membership with Zendra Assistant in the docs.
Keep the decisions that matter
The Assistant doesn’t decide what your membership means to the people who join it. Who it’s for, why they’d care, and what belonging to it should feel like were always the interesting questions, and they’re still yours. What it takes on is the vocabulary: turning the program you can already describe into plans, prices, and perks you can inspect before anyone else sees them.
If you’ve had a membership idea parked because the setup screen felt like a different conversation, open Assistant in Zendra and describe it the way you’d tell a friend. New to Zendra? Install it from the Shopify App Store; the Assistant is on every plan, including Free. And if you’d like the longer view of what makes a program worth joining first, start with how to start a membership program on Shopify.



Leave a Reply